WoW SoD Phase 2 Gnomeregan Raid Guide
The boss strategy guides for Gnomeregan, the new Level-Up Raid introduced in Season of Discovery Phase 2, have been prepared (Combined with wowhead walkthrough). These guides will assist your 10-player raid group in defeating each boss in Gnomeregan, which has been redesigned for Season of Discovery with entirely new boss encounters and mechanics. Please refer to our boss strategy guides below. Please note that clearing this raid requires each player to have sufficient consumables and the correct bis (Best in Slot) gear. If you are not adequately prepared, consider purchasing WoW Gold & Items from Gameusd to ensure you meet the requirements for entering the raid.
Grubbis
Grubbis is the initial boss encountered in Gnomeregan, accompanied by his pet basilisk, Chomper.

Grubbis Primary Abilities
Radiation
This is a backwards frontal cone damage ability which both does damage and knocks back if hit.
Trogg Rage
This is a enrage ability that makes Grubbis do extra physical damage.
Grubbis Mad
This is a AoE spell that does damage to everyone regardless of range, it doesn't hit for a lot but but can finish people off if healing is lacking.
Petrify
Chomper will sometimes cast this on the tank that's tanking him, causing him to get stuned for 8 seconds, this can be dispelled.
Grubbis Strategy
The Grubbis fight begins with a brief gauntlet-style encounter. Small waves of Troggs will spawn, followed by Poison Clouds. It is recommended to lure the Troggs into the Poison Clouds, causing them to explode and perish.
Grubbis spawns alongside his basilisk pet, Chomper, after a few waves. This fight can be easier to manage with two tanks, but disciplined damage dealers who focus on Grubbis himself can also handle it. It is important for everyone with an interrupt to pay close attention to Chomper's casts and kick the Petrify cast; otherwise, the only tank will lose threat of both bosses.
After the boss spawns, waves of Troggs and Poison Clouds will continue to appear. These can be managed by kiting the mobs into the clouds, as during the gauntlet. While it is possible to ignore the clouds for uptime and cleave, or to ignore the adds while focusing on the boss, this is not recommended for the average raid.
Using Nature Protection Potions during the first few clears can be helpful if the group lacks confidence in their damage and healing output. This will reduce the damage taken and, as a result, the amount of mana used to heal. It is important to note that this suggestion is subjective and should be marked as such.
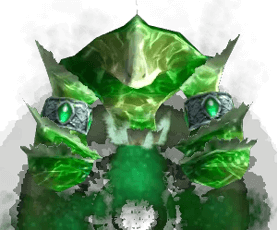
Viscous Fallout
Viscous Fallout is the second boss encountered in Gnomeregan. The city was partially taken over by radioactive oozes due to the released radiation. Viscous Fallout coalesced from that mass, forming its own consciousness and agenda.
Viscous Fallout Primary Abilities
Sludge
Spawns a pool of toxic slime that inflicts 150 Nature damage every 1.5 seconds and slows players by 50%.
Summon Irradiated Goo
Summons 3 Irradiated Goo.
Viscous Fallout Strategy
The primary consistent mechanic involves the Sludge ability, which causes the boss to drop pools of toxic slime that damage and slow anyone standing on them. Moving the boss out of these pools will significantly ease the burden on healers.
The Viscous Fallout boss may also spawn 3x Irradiated Goo, which will run towards the fallen Desiccated Fallout on the ground. It is important to kill them before they reach the corpses, as they will respawn the Desiccated Fallout and cause a lot more raid-wide damage if left uninterrupted. To make this easier, move the boss away from the Desiccated Fallout corpses initially to allow more time to kill the Irradiated Goo.
If circumstances beyond your control prevent you from managing them, be sure to interrupt them to prevent significant damage.
Crowd Pummeler 9-60
Viscous Fallout is the third boss that will be encountered in Gnomeregan. This boss can be located on the upper level of the Engineering Labs.
Crowd Pummeler 9-60 Primary Abilities
Gnomeregan Smash
Frontal spell that targets a player and if not dodged will knock the player off the platform and kill him.
Gear Toss
Throws out two gears onto the floor which move linearly and knock players back if hit.
The Claw
Targets a player and charges them doing a lot of damage and grabbing them.
Crowd Pummeler 9-60 Strategy
Although this may appear to be a complex boss, it primarily requires personal responsibility.
The fight only requires one tank and should be tanked normally. The tank should be cautious not to get knocked back to assist with melee DPS uptime.
The boss will throw out two gears onto the floor using Gear Toss. These gears move linearly through the boss area and can knock players off the platforms, causing death. It is important to dodge them. The gears move slowly, so positioning is key. Avoid using filler words and stick to a clear and concise writing style.
The boss may occasionally use a frontal Gnomeregan Smash ability that targets a player with a large projectile, causing knockback and fall damage. To avoid this, players should observe the boss's feet to determine its facing direction, as the upper half of the body may be facing elsewhere.
Towards the end of the fight (30%), the boss will also be able to cast The Claw! This ability targets a random player and dashes to grab them, dealing significant damage. The telegraphing of this ability is clear, so healers should pay attention to it and keep the targeted player alive through the initial damage and follow-up.
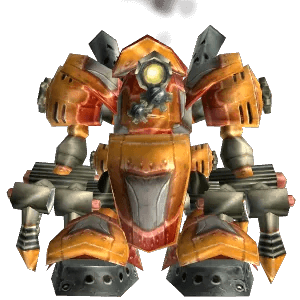
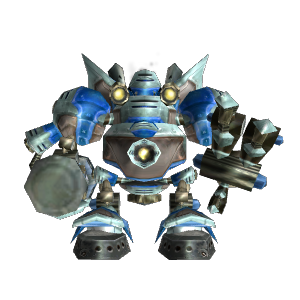
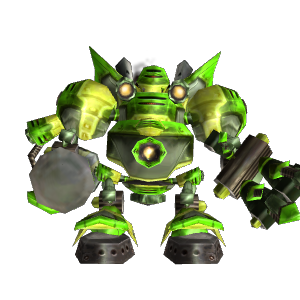
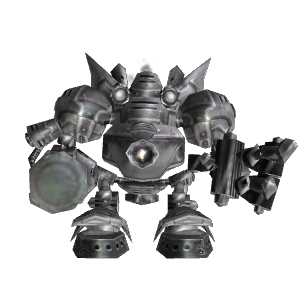
Electrocutioner 6000
Electrocutioner 6000 is the fourth boss that will be encountered in Gnomeregan. This robotic spider tank is driven by one of the insane gnomish lieutenants who still follow the leadership of Mekgineer Thermaplugg.

Electrocutioner 6000 Primary Abilities
Discombobulation Protocol
AoE spell that deals damage and knocks players back.
Magnetic Pulse
Targets a player with a debuff that changes their pollarity, this causes the player to inflict aoe damage around them and pull in players within 8 yards.
Static Arc
Discharges a chain lighting-like ability that hits 3 targets, and applies a 20 sec debuff that increases damage from Static Arc by 500%.
Electrocutioner 6000 Strategy
This boss fight requires some coordination. The tank should focus on tanking while the rest of the team should focus on dealing damage.
The main mechanic of the fight is Static Arc, which casts a chain lightning on a player and bounces twice, hitting a total of three players. These players get debuffed and cannot be hit by Static Arc again twice in a row, or the 500% damage increase will kill them.
To ensure safety, two pre-assigned groups should move in and out of close proximity to the boss, soaking every other Static Arc. The language used is clear, concise, and objective, adhering to formal register and precise word choice. It is recommended that caster damage dealers perform this task so that melee can maintain high uptime on the boss. While healers can also be assigned to move in and out, it is important that they have the freedom to heal since the fight has considerable damage throughout.
Finally, Magnetic Pulse is an ability that requires respect from all players. If targeted, the player must move to an empty space or a pre-assigned spot to avoid damaging others. It is important to note that the targeted player should never be further away from the boss than the group soaking Static Arc, as they may become the new target and potentially kill players with the debuff who are standing near the boss.
Alternatively, to deal with Static Arc, position two melee players on either side of the boss with a stationary healer positioned at a set distance from the boss. Another healer should alternate between being further away or closer to the boss than the first healer.
This strategy reduces the number of players required to move in and out, as only one healer needs to do so, instead of three.
It's important with this that the person targeted by Magnetic Pulse to never be further from the boss than the stationary healer.
Mechanical Menagerie
The Mechanical Menagerie is the fifth boss that will be encountered in Gnomeregan.
Mechanical Menagerie Primary Abilities
Chicken

Explosive Egg - Drops an explosive egg that explodes for AoE damage.
Cluck! - Buffs its own and its allies attack speed by 50%. This happens whenever the boss reaches the 75%, 50% and 25% thresholds.
Squirrel

Widget Volley - Targets a player, interrupts them and deals some damage.
Widget Fortress - Throws down an AoE effect which if stood on by any of the four bosses provides them a large damage reduction buff. This happens whenever the boss reaches the 75%, 50% and 25% thresholds.
Sheep

Frayed Wiring - Buff similar to Thorns which damages attacking enemies. Can be applied to any of the four bosses. This happens whenever the boss reaches the 75%, 50% and 25% thresholds.
Binary Bleat - AoE spell with 8 yard range that will silence everyone for 10 seconds.
Static Fleece - Periodically triggers a stun on the player if melee hit.
Whelp
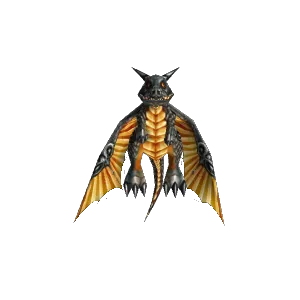
Sprocketfire Breath - Frontal fire breath that deals damage.
Overheat - Buff applied to any of the bosses, deals AoE damage to everyone within 15 yards of it, but increases damage taken by 25%. This happens whenever the boss reaches the 75%, 50% and 25% thresholds.
Mechanical Menagerie Strategy
There are four bosses in this encounter: a sheep, a chicken, a whelp, and a squirrel.
The chicken, squirrel, and whelp must be tanked, requiring at least two tanks.
There are two ways to split the three targets between the two tanks.
One tank can focus on the chicken, which deals the most damage, while the other tank can focus on the whelp and squirrel to spread damage evenly between them.
A tank on the whelp to more easily control the Sprocketfire Breath ability, while the main tank hold both the squirrel and chicken.
Neither of these is correct or incorrect, just depends on what your setup looks like.
The sheep instead of being tanked, targets a player and slowly moves towards them. It must be kited, ideally somewhat near the other three but not close enough where it'll Binary Bleat silence the melee and tanks.
For the first few clears, it is recommended to have two healers and an off-heal due to the potential for heavy damage.
The two tanks should hold the three bosses while the sheep is kited. The ranged group should stand near the middle to allow the tanks and melee to kite the bosses around the perimeter of the boss area. This strategy maximizes everyone's uptime and helps to deal with the Explosive Egg from the Chicken. The Explosive Eggs can be killed by ranged DPS to avoid taking damage, or ignored while kiting in a circle as they will despawn after a period of time.
Similarly, kiting around the room can also deal with Widget Fortress by pulling the mobs out of the shielded area immediately.
The damage per second (DPS) should be distributed evenly among the bosses. However, it is important to pay attention to which boss the whelp applies Overheat to, as this causes the target to take 25% more damage while the buff is active. Therefore, it is more effective to focus on that boss while the buff is up.
It is crucial that all bosses die at the same time to prevent them from casting Self Repair, which can only be cancelled if all bosses are at 1hp. This ability will heal them for 31% of their total health.
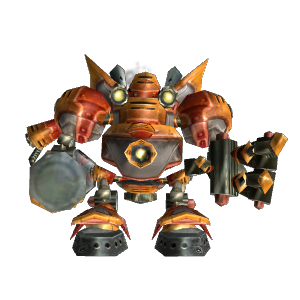
Mekgineer Thermaplugg
Mekgineer Thermaplugg is the final boss encountered in Gnomeregan. Once a brilliant and wise tinker destined for the position of High Tinker, his closest friend, High Tinker Mekkatorque, was chosen instead due to the council of tinkers deeming Thermaplugg too ambitious.

Mekgineer Thermaplugg Primary Abilities
This is a four-phase fight, and each boss will be explained separately below. The overarching mechanic is to activate bombs.
While the boss is active, it can activate on any of the six pillars and drop any of the following, depending on which boss is active:
Incendiary Bomb
When STX-96/FR is active, drops occur. When these drops explode, they cause relatively high damage and leave a ground fire effect that also deals damage.
Frost Bomb
When STX-97/IC is active, drops occur which, when exploded, cause relatively high damage and leave a ground that slows players.
Radioactive Bomb
While STX-98/PO is active, drops occur. When these drops explode, they cause relatively high damage and leave a ground that applies a disease, increasing nature damage taken by 50%.
To prevent the spawning of enemies, a player must click the red button located on the right side of the corresponding pillar.
It is important to note that a player cannot click the button twice in a row. Therefore, if a pillar activates twice, a backup player must be ready to act.
If your raid composition lacks ranged players and you follow a free-for-all strategy, clear communication is crucial as only one person can click the button every 30 seconds.
STX-96/FR
Sprocketfire
This is a stacking dot damage that gets applied to the tank, creating a forced tank swap during the boss.
Sprocketfire Punch
Does some damage to its current target applies Sprocketfire, eventually forcing a tank swap to mitigate damage taken.
Furnace Surge
The boss will cast a frontal fire breath-like spell, if hit will apply repeated stacks of the Sprocketfire debuff.
STX-97/IC
Supercooled Smash
Does some damage to its current target applies Freezing, at 10 stacks, it applies Frozen Solid, which can force a tank swap.
Coolant Discharge
Casts a raid-wide AoE damage ability, this also applies Freezing. If a target is Frozen Solid, it wipes the raid instead.
Freezing
The debuff caused by the previous two spells, this is a stacking slow that eventually causes the target to become Frozen Solid. This is a dispellable debuff.
STX-98/PO
Radiation Sickness
Stacking debuff that increases the nature damage taken by 50%.
Hazardous Hammer
Does some damage to its current and applies Radiation Sickness.
Toxic Ventilation
Interruptible AoE channel ability that deals nature damage.
STX-99/XD
During its fourth phase, the boss can now use all of the previous abilities.
Mekgineer Thermaplugg Strategy
This encounter necessitates two tanks, as each phase has a distinct forced tank swap mechanic. Additionally, the damage taken can be quite intense, so it is recommended to have more than two healers for the first few clears, particularly in less experienced groups.
During the encounter, the six pillars surrounding the boss arena will occasionally activate and spawn bombs of different types depending on the current phase. These pillars must be deactivated by clicking the red button on their right side. There are two recommended ways to deal with this mechanic, depending on your raid composition.
The first is to assign each of your at least 6 ranged DPS/healers to a different pillar and have them ready to react in case their specific one gets activated. This will minimize the total amount of chaos and bombs spawned.
If your team has a more balanced or melee-heavy composition, you can assign 2-4 ranged DPS to deal with the buttons while standing somewhat central to be able to react to any of the pillars in equal time. In this case, make sure you have people focused on killing the bombs, which have very low HP and can be killed with any single spell.
In the first phase, the fire boss will stack Sprocketfire on the tank using Sprocketfire Punch, Furnace Surge, and Incendiary Bombs. The boss will also stack Sprocketfire on the raid using Furnace Surge and Incendiary Bombs. The tank can avoid Furnace Surge by running directly away from the boss during its frontal attack. Between 5 and 7 stacks, the off-tank should taunt and pick up the boss until the main tank's Sprocketfire debuff expires.
When the boss reaches 50% health, the current phase will end, and the boss will return to the center to begin the next phase.
In the second phase, the frost boss will stack Freezing on the raid through Coolant Discharge and Frost Bomb, and on the tank through Supercooled Smash. This debuff can be dispelled, allowing one tank to handle the boss for the entire phase without worrying about being Frozen Solid. Ensure that both the tank and the raid do not exceed 9 stacks, as the 10th stack will freeze the target. When Coolant Discharge is cast, it may result in a raid-wipe.
The current phase will end when the boss reaches 50% health, and the next phase will begin as the boss returns to the center.
The third phase involves the nature boss stacking Radiation Sickness on the raid through Radioactive Bomb and on the tank through Hazardous Hammer. It is recommended to either dispel these stacks or keep them low. Otherwise, when Toxic Ventilation is cast, it will cause massive AoE damage. Although Toxic Ventilation can be interrupted, the lack of a cast bar can make it more challenging than usual, so those with interrupts should pay close attention.
During the fourth phase, STX-99/XD will spawn and possess all the abilities mentioned above. This may seem chaotic, but it actually makes each individual mechanic somewhat easier to deal with. None of the three stacks will be a major concern as long as you continue dealing with the bombs and remember the previous basic mechanics.
This boss has half the health of the previous three bosses and dies once it reaches 0%.
Finally, Mekgineer Thermaplugg will spawn. He does not have any significant impact and can be killed without any concerns.